Wednesday, December 18, 2013

Look of the Day: Doe Eyes

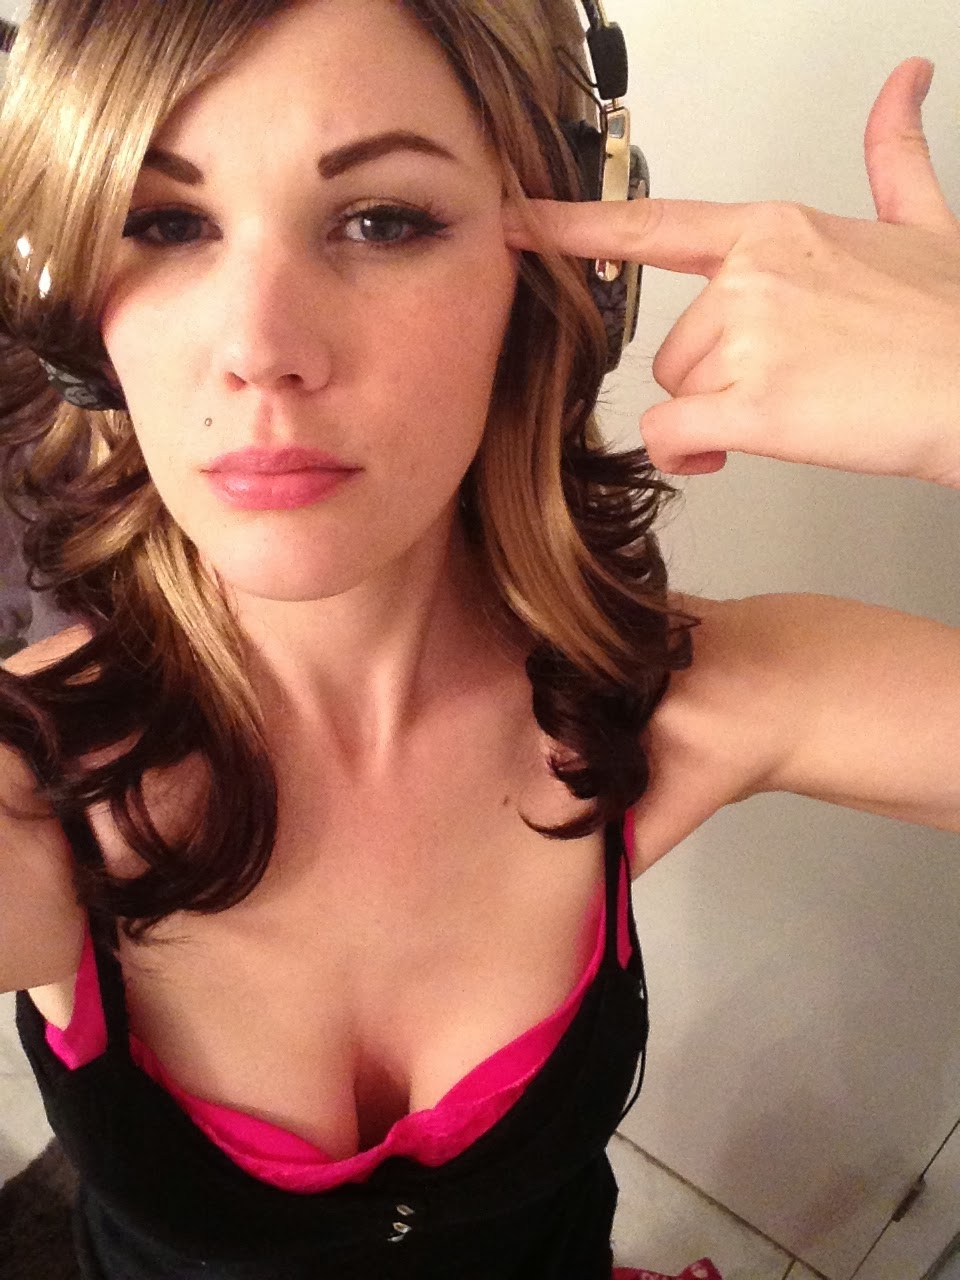
I wasn't sure what I wanted to do today, a good friend is coming to town so I didn't want to paint my face too crazy, I just went with a natural look.


I did some major experimenting and building of thee eyebrows. I think it turned out alright. I drew them in with a Jordana eyebrow pencil in Medium and swooshed E.L.F. Studio Eyebrow Treat & Tame in Dark to build the look of extra hair. I am liking the big full eyebrow look right now.

I used Lancome 'Aquatique' Waterproof EyeColour Base and an E.L.F. Essential Jumbo Eyeshadow Stick in Little Miss Thing and covered it with E.L.F. Studio Prism Eyeshadow in Sunset. I highlighted the inner corners of my eyes in Nyx Jumbo Eyeshadow Stick in Milk. I lined them with Revlon Colorstay liquid eyeliner in Blackest Black.

Apply some long, luxurious lashes like Ardell Whispies. :)

I did all the rest as I usually did, coconut oil as a base, Revlon ColorStay Foundation in Medium Beige, E.L.F. Studio HD Powder, E.L.F. Studio Cream Blush in Flirt, E.L.F. Studio Contouring and Blush in Turks & Caicos (just the contouring color.) Under my eyes I concealed with E.L.F. Essential cover stick in Apricot Beige. I concealed blemishes with Revlon ColorStay Concealer in Light Medium (I think..)

Lips were lightly glossed with E.L.F. Essential Lip Balm Tint in Grapefruit.


Still rocking Nine Inch Nails Hesitation Marks, it seems to perfectly sum up what I'm going through in my relationship right now. Excuse my sadness. I will come back around soon.


Tuesday, December 17, 2013

My Obsession with Coconut Oil

I have had nearly a 10 year relationship with extra virgin coconut oil. Being a lover of all things tropical AND a (reformed) health nut, I hopped eagerly on board when the claims started floating in about this miracle Elixer. From weight loss to anti-aging, this relatively low-priced oil can do it all, they say. I'm not sure if ALL the claims are true but I really have found it to be an indispensable part of my beauty routine.

I use it for:
Skin moisturizer
Facial moisturizer & eye cream
Acne, preventing & treating
To heal & fade acne scars
To reduce blackheads
Prevent/treat eczema
Eyelash growth treatment
Makeup remover
Add it to concealer to make a custom foundation (if you'd like you can gently blot the excess oil after you've applied to make it matte, use a tissue)
Add it to foundation to make it lighter coverage
Massage oil
Lube (take that for whatever you want it to mean, it works too well to not mention.)
Deodorant
Foot deodorant/moisturizer
Healing and preventing razor burn (use it on your bikini line; you are welcome.)
As a base for homemade facial scrub, body scrub and lip scrub
To remove lipstick from lip liner brushes
To remove lipstick from your face :)
Makeup brush conditioner (I actually prefer olive oil but this works)
Layer of protection under drying lipsticks (apply, let it soak in a little, blot)
Scalp & hair treatment
Food (oh wait, it's edible? I almost forgot!)
Gentle laxative (or so I've heard, I wouldn't know because I have robot parts.)

What I do not like to use it for but other people do:
Shaving cream (it clogs up your razor hardcore)
Weight loss supplement (this has never helped me lose weight but it never seemed to make me gain weight either). Whether or not it speeds up metabolism is not something that's been proven to me. You will lose weight like crazy, however, if you use this in conjunction with a low carb diet. But you will lose weight like crazy if you do a low carb diet without coconut oil too.


VERDICT:
The PROS definitely outweighs the CONS. In fact the only con I can think of is the price IF you compare it to other oils. If you compare it to the products purchased for the uses listed above, it is a bargain.

I might also mention for every makeup look I have done, I have used coconut oil under my makeup. I should perhaps list it every day. I absolutely love coconut oil. It is my Holy Grail product.

Sept. 10, 2014  UPDATE,!! 
I do not use coconut oil on my face anymore. It started out great and then my pores started clogging up on my cheeks. I tried to blame everything but the coconut oil, But alas, coconut oil on the face is not for me anymore. So sad...it makes my skin so soft!
And NO MORE using coconut oil as lube, not good.
That's all I will say regarding that.
It still works lovely as a body moisturizer, food, eye makeup remover, etc etc etc. Carry on. :)

Look of the Day: Catching Fire


I wanted to try the NYX Jumbo Eyeshadow Pencil in Orange; unfortunately this is a discontinued color. I ordered it (new) off eBay. I really wanted the Cherry color as well but it was nowhere to be found, but there is really no reason to get it. If you have a a red eyeshadow you can simply cover the Orange with red shadow or use white (Milk) and any color over it. Simple.

I started out by applying a thin layer of Nyx eyeshadow base in White all the way up to my eyebrows. Very thin layer people. I painted my eyelid in Nyx Jumbo Eyeshadow Pencil in Orange, avoiding the inner 1/3 of my eyelid, and patted it out to thin it so it doesn't crease.

Apply matte orange eyeshadow to the middle of your eye, matte red on the outer corner, and matte yellow on the inner corner. (You might need to apply some white first to make the yellow show up, like the Nyx Jumbo Eyeshadow Pencil in Milk.) I used Red eyeshadow from a Coastal Scents/Random-no-name eBay palette and the orange and yellow from the E.L.F. Studio 144-Piece Ultimate Eyeshadow Palette in Brights. I'm dying to try the Nyx Primal Colors but I haven't gotten my hands on any yet.

Use a black liquid eyeliner to line your top lashes. I used Revlon Colorstay Liquid Eyeliner in Blackest Black.
Take a small fluffy detail brush and dab some of the black eyeliner off the applicator, and use it to darken your lower lashes. You do not want a harsh line here, just smoke it out. I used the Real Techniques Accent Brush, quite possibly the most useful brush I own. I also use this technique to fill in any spaces in my lash line and darken my waterline. Make sure you don't accidentally ruin your nice clean eyeliner line when you do this.

Do the rest of your face, I used Revlon Colorstay Foundation in Medium Beige applied with an E.L.F. Studio powder brush that I lightly spritzed with MAC Fix+, E.L.F. Essential All Over Color Stick in Apricot Beige to lightly even out under my eyes and conceal blemishes, Contoured with E.L.F. Studio Contouring Blush and Bronzing Cream in St Lucia, did my brows with the E.L.F. Studio Eyebrow Kit in Medium and the E.L.F. Studio Eyebrow Treat & Tame in Dark to help fill in sparse areas. I'm still not sure about that product...  Highlight under your brows very lightly if you need to, I dabbed a tiny bit of Nyx Milk right under the brow and blended it out.

Lips are an Ellen Tracy Thick Stick in a nude-ish color. I forgot to note the name.

I pulled my hair back into a big messy bun and I completely forgot to do anything to my lashes. You should apply false lashes or mascara, unlike me.


Listen to Nine Inch Nails, Hesitation Marks, it will make a difference.

Halloween makeup: Fallen Angel

You are going to need some accessories for this one.


(I apologize for not really having any good pictures of my makeup, I didn't plan on doing this post until later.)

To do the makeup I went with a light foundation, LancĂ´me Color Ideal, and set with MakeUp Forever HD Powder. I lightly contoured underneath my cheekbones with Lorac Baked Matte Satin eyeshadow in Social.

To do the eyes apply black creme eyeliner all over your eyelids and wing the outer edges heavily. Smudge it out with Lorac black matte eyeshadow. Paint some black makeup-smudged tears and set all the black eye color with MUFE HD Powder. Take a clear glitter eyeliner, preferably in aurora borealis hues, and paint over some of the smudged tears. Paint up near your eyes, this is to look as if you are crying angelis  glitter tears.

Highlight the inner corners of your eyes with NYX Jumbo Eyeshadow Pencil in Milk (or any white eyeliner.) apply more glitter here if you'd like.

Get some massive false lashes and paint the tips blood red with acrylic paint (this is optional.) Let it dry completely. Glue on.

I did my brows with a Jordana eyebrow pencil in medium.

Use some pretty innocent pink lipstick, like Revlon Lip butter in Cupcake or Strawberry Shortcake.

Put on your wings, white dress, black fishnet stockings & black OTK motorcycle boots. Wear black Victorian jewelry. Carry as many firearms as possible. ;)


Friday, December 13, 2013

How do you clean makeup brushes?

I used to heavily neglect my makeup brushes but that's all in the past. I dutifully clean the eyeshadow brushes and eyeliner brushes every day and the face brushes at least once a week. (If I use a flat foundation brush I clean that each time.)

I made my own brush cleaner using roughly 1/3 olive oil and 2/3 dish soap or baby shampoo. I am not a measuring-type person so I just guess the amounts.


Pour them in and if someone is taking pictures you will probably spill something.


I should Photoshop that out.


Mix them up, they will emulsify and become creamy. That part is my favorite. Gotta love science.

Now on to the cleaning part.
When I wash my brushes I use cold water so I don't melt the glue. My secret to squeaky-clean brushes is one of these brush cleaners from the craft store, it's called the Brush Preserver Kit from Folk Art. It's really best for synthetic fiber brushes but you can use your own judgement, I use some of my smaller animal hair brushes on the brush cleaner & it hasn't ruined them at all. It really gets in between the bristles and gets all the makeup out. This is important because I have those cute white bristle brushes with pink tips and I don't want them to look dirty! And it also helps keep bacteria at bay. Drag the brushes though it only one way, tilting the brush almost horizontal and pull from the handle so the bristles drag behind. You don't want to destroy your brush by going crazy here.


Try not to tip the brushes upside down so water will stay out of the ferrel. I gently squeeze the brushes in a super-absorbent hair towel, reshape them and lay them out, folding the towel at one end so the brush head tilts downward.


That's it! Super clean brushes. If you use natural hair brushes you can rub some olive oil in the bristles, let them soak for 5 minutes and repeat the cleaning process. No need to do this with taklon/synthetic brushes unless they are in bad shape and you are trying to revive them.

Look of the Day: smoky nude

One of my favorite challenges is doing a sultry, sexy look while also looking like you aren't wearing much makeup. For this I like to do a nude smoky eye. As a random side note, this 'Look of the Day' had absolutely nothing to do with the jerkface redneck random Walmart customer that I overheard commenting to his much nicer buddy, who had just complimented how I looked, "yeah but did you see much sh..(blaaank) she had on her face?" Just yesterday...Nothing to do with that. Yes, I had FOUR different bright colors on my eyelids but does that give him the right to have an opinion? Absolutely Not!! Not if it is clearly a WRONG opinion. I wanted to pull a Walter White on his @ss but I was a good, civilized person about it and I just slashed his tires while he was shopping.

Sooo anyway.....here's the look.


I started off with Maybelline Color Tattoo eyeshadow in Tough as Taupe. I blended it up and out before it dried. I then used a brownish gray shade from the E.L.F. Studio 144-Piece Ultimate Eyeshadow Palette in Neutral over the taupe, and brightened the inner corners of my eyes and up into the inner 1/4 of my eye with NYX Jumbo Eye Pencil in Milk. I blended it out with a small Real Techniques detail brush.

I took a pink stiff brush and added a deep crease with a darker gray shadow from the E.L.F. palette. I smudged it out with a Real Techniques crease blending brush and added more eyeshadow with the detail brush inside the smudged shadow to intensify the crease. I selected a darker gray--almost black--and further deepened the outer part of the crease and brought it down across my lash line, focusing on the outer ends. I also shaded the inner half of my lower lash line.

I decided to kick it up a notch and picked up a little E.L.F. Studio Cream Eyeliner in black and smudged it across the lash line, trying to keep it as close to my lashes as possible. I again focused on the outer edges and blended it so it gradually ended about 2/3 of the way in. I brought it out slightly into a subtle wing. I added a touch to the lower lashes. The idea was to keep it as natural looking as possible, as if my lashes were just really, really thick. ;) I didn't wear falsies out of sheer laziness but I coated my lashes in Urban Decay Skyscraper Mascara. I did my brows with the E.L.F. Studio Eyebrow Kit in Medium.

I finished off with a light contour under my cheekbones using The Balm bronzer in Betty Lou-Manizer and added a flush to my cheeks with The Balm blush in Hot Mama! (Yes, the exclamation point is part of the name.) The Betty Lou-Manizer is actually meant to be an all-over color or a highlight aka FAKE TAN but it was all that was nearby and that made the decision for me.


Eat your heart out, Walmart Customers.


Thursday, December 12, 2013

Look of the Day, Candy Eyes

I wanted to try my new NYX eyeshadow base in White and do something colorful. I used my Urban Decay Deluxe Eyeshadow Palette to create this look:


I applied my Revlon Colorstay foundation (medium beige) with the E.L.F. Studio powder brush, setting it with E.L.F. Studio HD powder in Shimmer.

I coated my eyelids and the highlight on my browbone with the NYX Eyeshadow Base in White, and let it dry. It didn't dry completely... I used my UD Deluxe Eyeshadow palette to do a trio of colors, starting with Honey in the inner corner, Graffiti in the middle and Peace on the outer corner, slightly transitioning them into each other. I did with crease with Half Baked and Smog and blended it slightly upwards with a Lorac baked matte satin eye shadow in Posh. I use that one almost every day to blend my shadows upward, it is just a nearly invisible matte nude color on me.

I lined my lower eyelashes with UD's 24/7 eyeliner pencil in Electric and Graffiti, Electric on the outer corner and Graffiti in the middle to watch the eyeshadow colors, then set them with the corresponding color eyeshadow. I highlighted my inner corner with a NYX Jumbo Eye Pencil in Milk.

I applied Revlon Colorstay Liquid eyeliner, smudging it a little with the E.L.F. Studio Angled Eyeliner Brush. This took away any mistakes or harsh edges and made a warmer, smokier look.

I finished my eyes by applying some "natural" false lashes.

To really make the eyeshadow colors pop, when I was all finished with the eyes I dabbed my finger in each eyeshadow color and pressed it over the top. I've always noticed with Urban Decay eyeshadows you can get a better color payoff this way.

My brows were done with the E.L.F. Studio Eyebrow palette in medium. I exaggerated them, which looked great from several feet away but up close you can see where the brows end and the pretend, drawn on brows start.

With the E.L.F. Studio Flawless Concealer brush, I buffed in an E.L.F. All Over Cover Stick from the essential line in Light Beige and set with Studio HD Powder.

I contoured with E.L.F. Contouring Blush & Bronzer in St. Lucia, and used the Studio HD Blush in Headliner.

I used the E.L.F. All Over Color Stick in Persimmon to slightly highlight the top of my cheekbones.

My wig of choice today is the Gothic Lolita Classic (Wavy) in Light Blonde Mix, which is probably my favorite wig ever. Evarrr.


Verdict on NYX Eyeshadow Base in White:
I am impressed with this base. It worked as a perfect white highlighter, if you use a light hand. My shadows did seem to pop a little more, and they lasted all day with no creasing. I did have trouble getting it to dry, and it kept creasing on my eyelid until I applied my eyeshadow. Then it was set. The NYX Eyeshadow Base in White gets an A+.